

Code editor
Write and edit HTML, CSS, and JavaScript directly in your browser with the built-in Monaco editor.
Code editor
YWT includes a full-featured code editor built on Monaco — the same editor engine that powers Visual Studio Code. You can write HTML, CSS, and JavaScript directly in your browser without installing anything on your computer.
Editor layout
The editor is divided into three main areas:
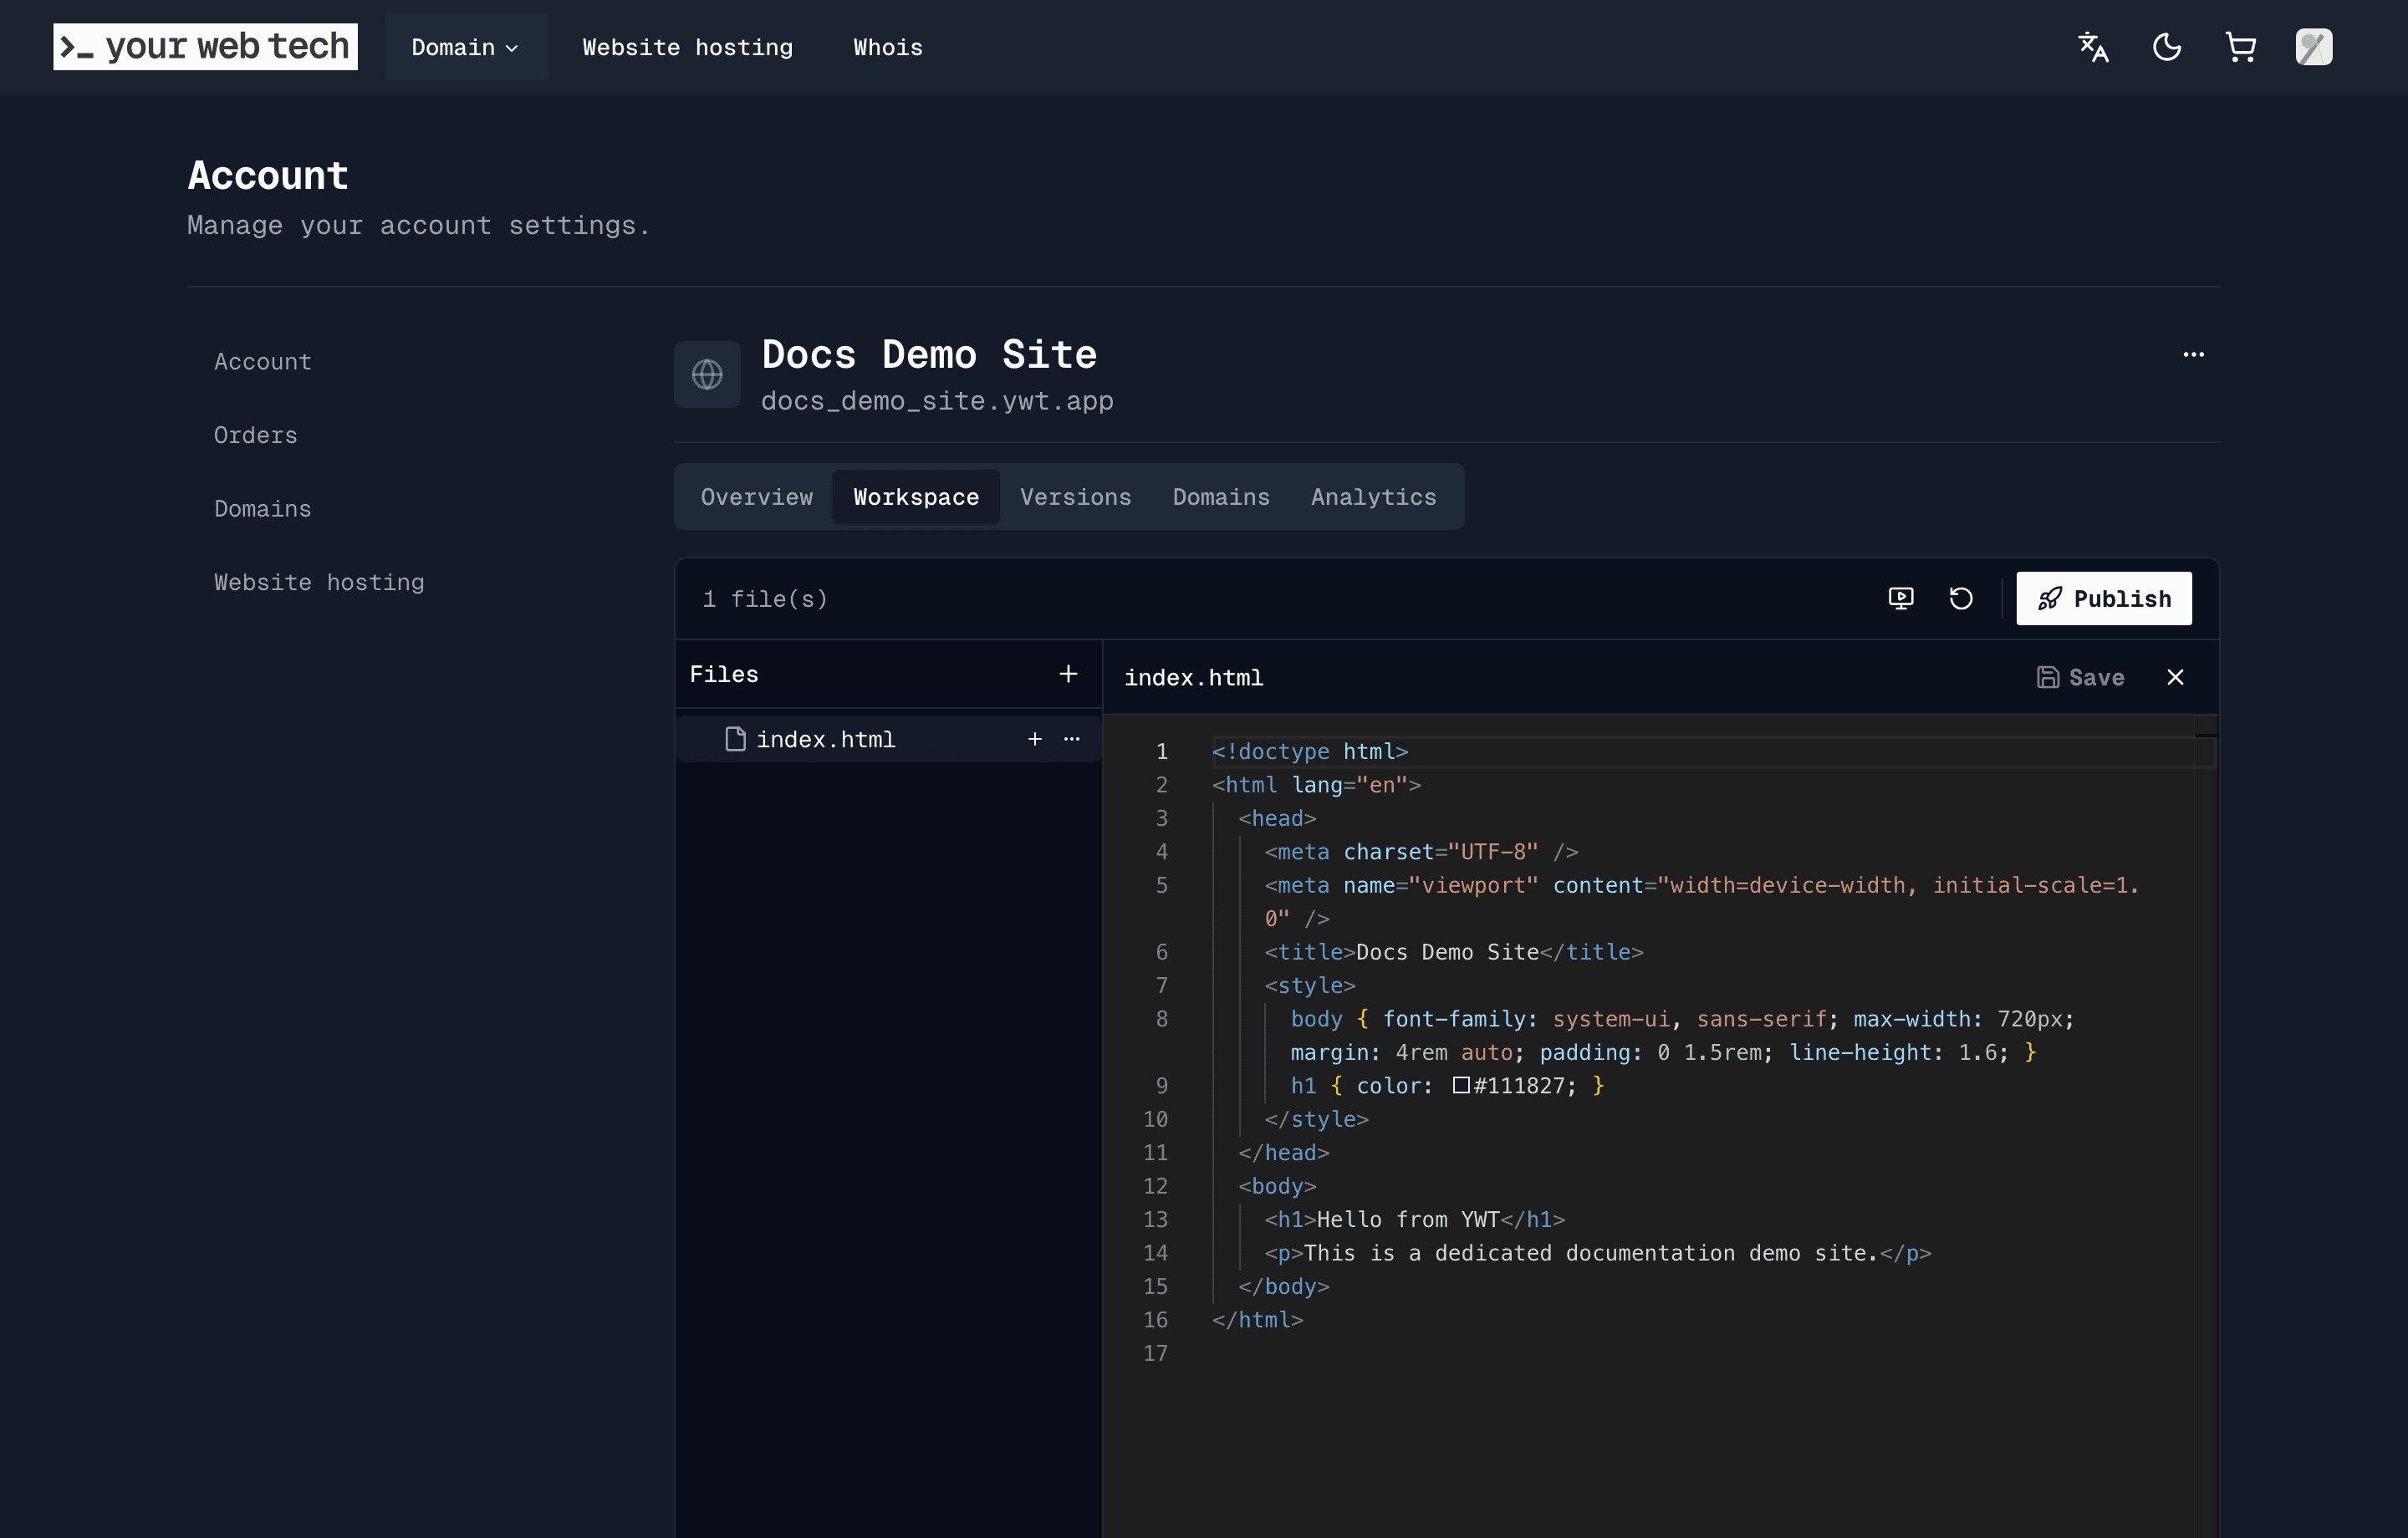
File tree (left panel)
The file tree shows every file and folder in your site project. From here you can:
- Browse files by clicking to open them in the editor pane.
- Create new files or folders using the buttons at the top of the panel.
- Rename a file by right-clicking and choosing Rename.
- Delete a file by right-clicking and choosing Delete.
- Upload files into the workspace.
Editing area (center)
This is where you write code. The editing area supports:
- Syntax highlighting for HTML, CSS, JavaScript, JSON, Markdown, and more.
- IntelliSense — Auto-completion suggestions as you type (for CSS properties, HTML tags, and common JavaScript patterns).
- Multiple tabs — Open several files at once and switch between them using the tab bar.
- Error highlighting — Syntax errors are underlined in red so you can catch mistakes as you type.
- Minimap — A zoomed-out preview of the full file on the right edge, useful for navigating long files.
Toolbar (top)
The toolbar provides quick access to the most common actions.
| Button | Action |
|---|---|
| Preview | Opens a workspace preview in a new browser tab. |
| Start over | Clears the workspace after confirmation. |
| Publish | Deploys the current state of your files. Free-plan users are asked to choose a paid plan before publishing publicly. See Deploy your site. |
Working with files
Creating a file
- In the file tree, click the New file icon (or right-click a folder and choose New file).
- Enter a filename including the extension (e.g.,
about.html,styles/main.css). - Press Enter. The file is created and opens in the editor.
Creating a folder
- In the file tree, click the New folder icon (or right-click and choose New folder).
- Enter a folder name and press Enter.
- You can then create files inside the folder.
Renaming and deleting
Right-click any file or folder in the tree to see the context menu with Rename and Delete options. Deleting a folder removes everything inside it.
Deleted files cannot be recovered unless you have a previous deployment that contained them. Consider publishing before making large deletions so you can roll back if needed.
Saving changes
When a text file is modified, the editor marks it as changed and enables the Save button in the file header. You can also press Cmd + S on macOS or Ctrl + S on Windows/Linux to save the current file.
Saving changes writes them to the workspace only. Your live site is not updated until you click Publish. Think of the editor as your workspace and publishing as your go-live action.
Keyboard shortcuts
The Monaco editor supports most of the keyboard shortcuts you may already know from VS Code.
| Shortcut (Mac) | Shortcut (Windows/Linux) | Action |
|---|---|---|
Cmd + S | Ctrl + S | Save the current file |
Cmd + F | Ctrl + F | Find in current file |
Cmd + / | Ctrl + / | Toggle line comment |
Cmd + Z | Ctrl + Z | Undo |
Cmd + Shift + Z | Ctrl + Shift + Z | Redo |
Live preview
Click the Preview button in the toolbar to open a workspace preview in a new tab. The preview shows the current workspace state before you publish it.
Workspace previews are different from deployment preview URLs. Workspace previews use a tokenized editor preview link for unpublished files; deployment previews are public links to a fixed published version. See Previews for the full comparison.
Tips for working efficiently
- Keep related files grouped in folders so they are easy to find in the file tree.
- Use the preview tab after saving meaningful changes so you can check the rendered page before publishing.
- Publish meaningful milestones so you have useful versions in your deployment history.
- Keep file names lowercase and use hyphens instead of spaces (e.g.,
my-page.htmlrather thanMy Page.html) to avoid URL issues.
Next steps
- Deploy your changes to make them live.
- Understand previews before sharing links with others.
- Browse templates if you want a pre-built starting point.
- Set up a custom domain to use your own
.chor.liaddress.