

Manage DNS Records
Learn how to add, edit, and delete DNS records for your domain using the YWT DNS manager.
Manage DNS Records
The YWT DNS manager lets you control how your domain resolves on the internet. You can point your domain to a web server, configure email delivery, verify domain ownership, and much more — all from a single tab in your domain settings.
Your domain must be using YWT nameservers to manage DNS records here. If you are using external nameservers (for example Cloudflare), you need to manage records at that provider instead. See Nameservers for details.
Opening the DNS manager
Navigate to your domain
Log in to your YWT account, go to Domains, and select the domain you want to configure.
Open the DNS tab
Open the Nameservers & DNS Records tab in the domain detail view. You will see the nameserver controls, DNS records, and DNSSEC controls for this domain.
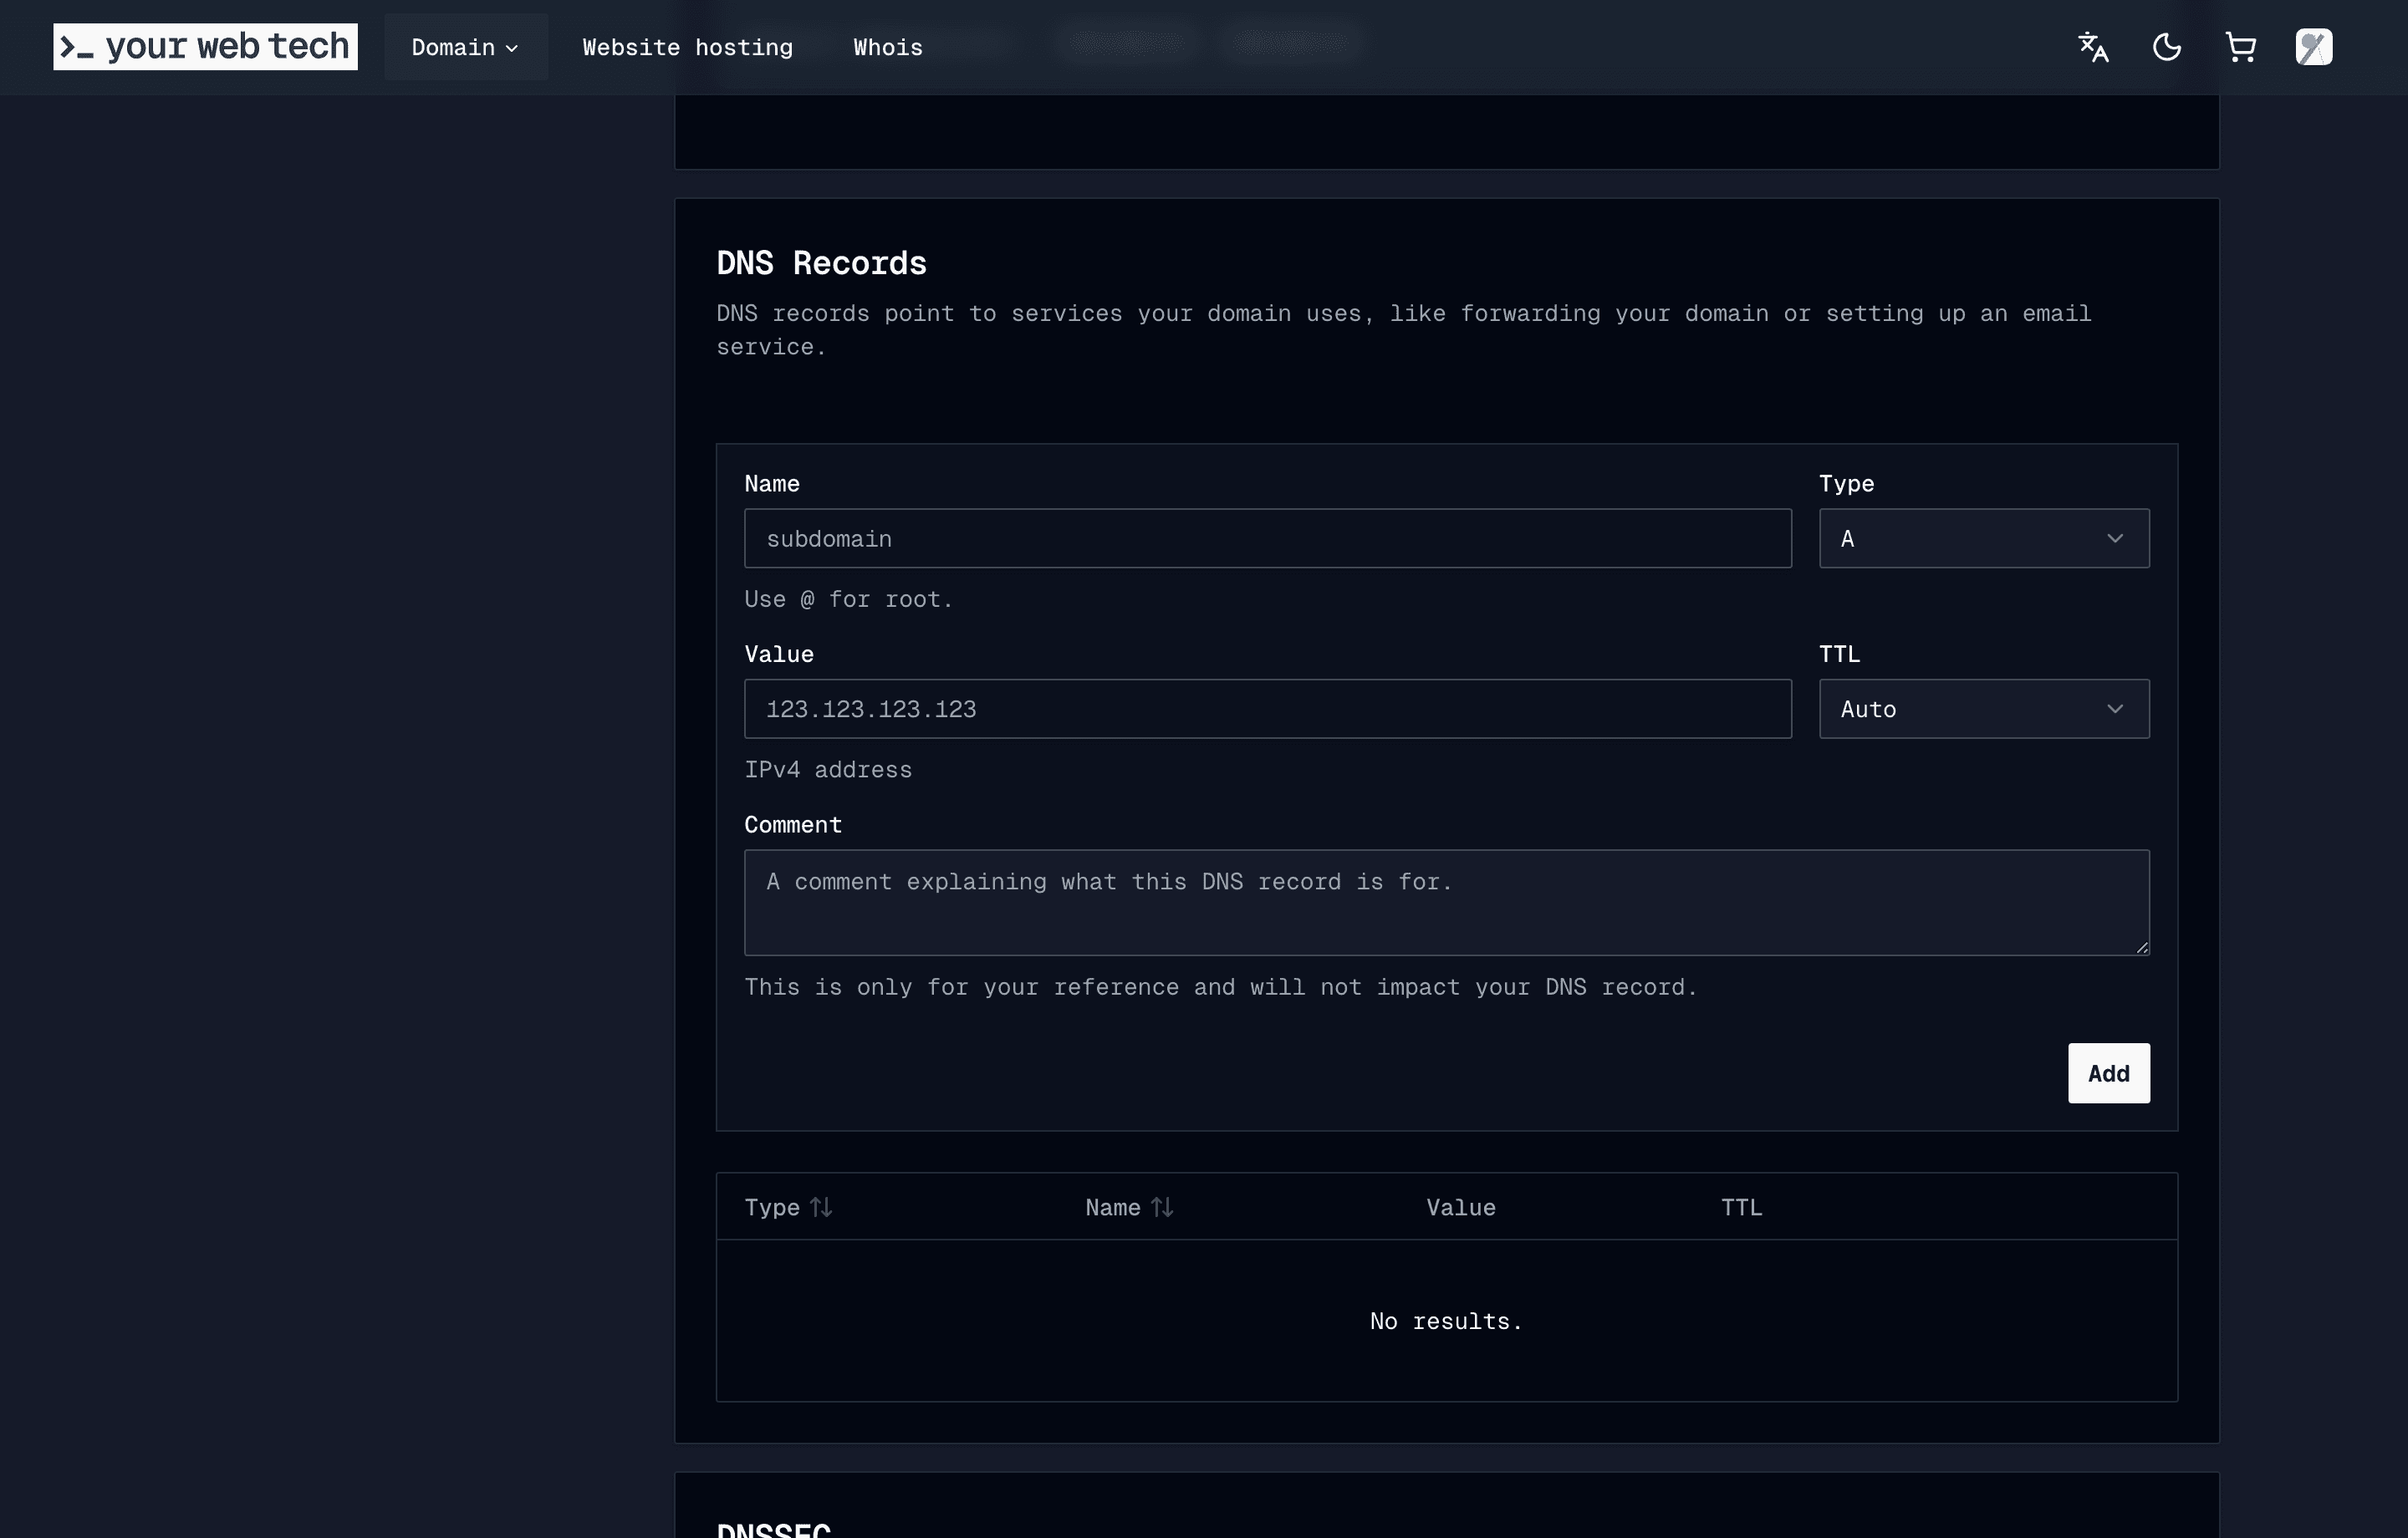
Add, edit, or delete records
- Click Add record to create a new entry.
- Click the pencil icon next to an existing record to edit it.
- Click the trash icon to remove a record you no longer need.
Save your changes
After adding or editing records, click Save. Your changes will begin propagating across the global DNS network.
Supported record types
YWT supports the following DNS record types:
| Type | Purpose | Example value |
|---|---|---|
| A | Points a hostname to an IPv4 address | 185.199.108.153 |
| AAAA | Points a hostname to an IPv6 address | 2606:50c0:8000::153 |
| CAA | Controls which certificate authorities can issue SSL certificates | 0 issue "letsencrypt.org" |
| CNAME | Creates an alias from one hostname to another | target.example.net |
| HTTPS | Publishes HTTPS service binding hints | 1 . alpn=h2 |
| MX | Routes email to a mail server (with priority) | 10 mx1.example.com |
| TXT | Stores text data (SPF, DKIM, domain verification) | v=spf1 include:_spf.google.com ~all |
| NS | Delegates a subdomain to different nameservers | ns1.example.com |
| SRV | Specifies a host and port for specific services | 10 5 5060 sip.example.com |
Record fields explained
When adding or editing a record you will encounter these fields:
- Type — The record type (A, CAA, CNAME, HTTPS, MX, etc.).
- Name — The hostname or subdomain. Use
@for the root domain, or enter a subdomain likewwwormail. - Value — The target address, hostname, or text content depending on the record type.
- TTL (Time to Live) — How long DNS resolvers should cache this record before checking for updates. New records default to Auto; you can also choose a fixed duration ranging from 1 minute up to 1 day.
- Priority — Used by record types that rank targets, such as MX and SRV. Lower numbers mean higher priority.
- Comment — Optional note for your own reference.
TTL and propagation time. After you save a change, it does not take effect instantly everywhere. DNS resolvers around the world cache records for the duration of the TTL. If your previous TTL was 3600 seconds, it can take up to one hour for all resolvers to pick up the new value. In some edge cases, propagation can take up to 48 hours. See Propagation for a deeper explanation.
Tips for managing records
- Lower your TTL before making changes. If you know you will be updating a record soon, reduce the TTL to 300 seconds (5 minutes) a day in advance. This way, when you make the actual change, it propagates much faster.
- Avoid conflicting records. A CNAME record cannot coexist with other record types on the same name. If you add a CNAME at the root (
@), YWT converts it to an ALIAS-style record internally because root CNAME records are not valid DNS. - Use descriptive values. When adding TXT records for verification, keep a mental note (or a comment in your project docs) of what each TXT record is for, since they can accumulate over time.
Common configurations
Not sure which records to add for your setup? Head over to Common DNS Setups for step-by-step recipes covering Vercel, GitHub Pages, Google Workspace, email authentication, and more. To redirect a domain to another URL, see URL forwarding.